


Why we decided to create Build Your DXP
We recently launched a community-curated catalog to explore the best-of-breed services that power today's Digital Experience Platforms.
Learn More →
This short guide is aimed at new users and will walk through creating a project, schema, content, publishing and querying via GraphQL. You'll need an account to get started, sign in or create a new account.
Once logged in, you will see a list of any projects you create or have been invited to.
From the sidebar, navigate to the Schema editor.
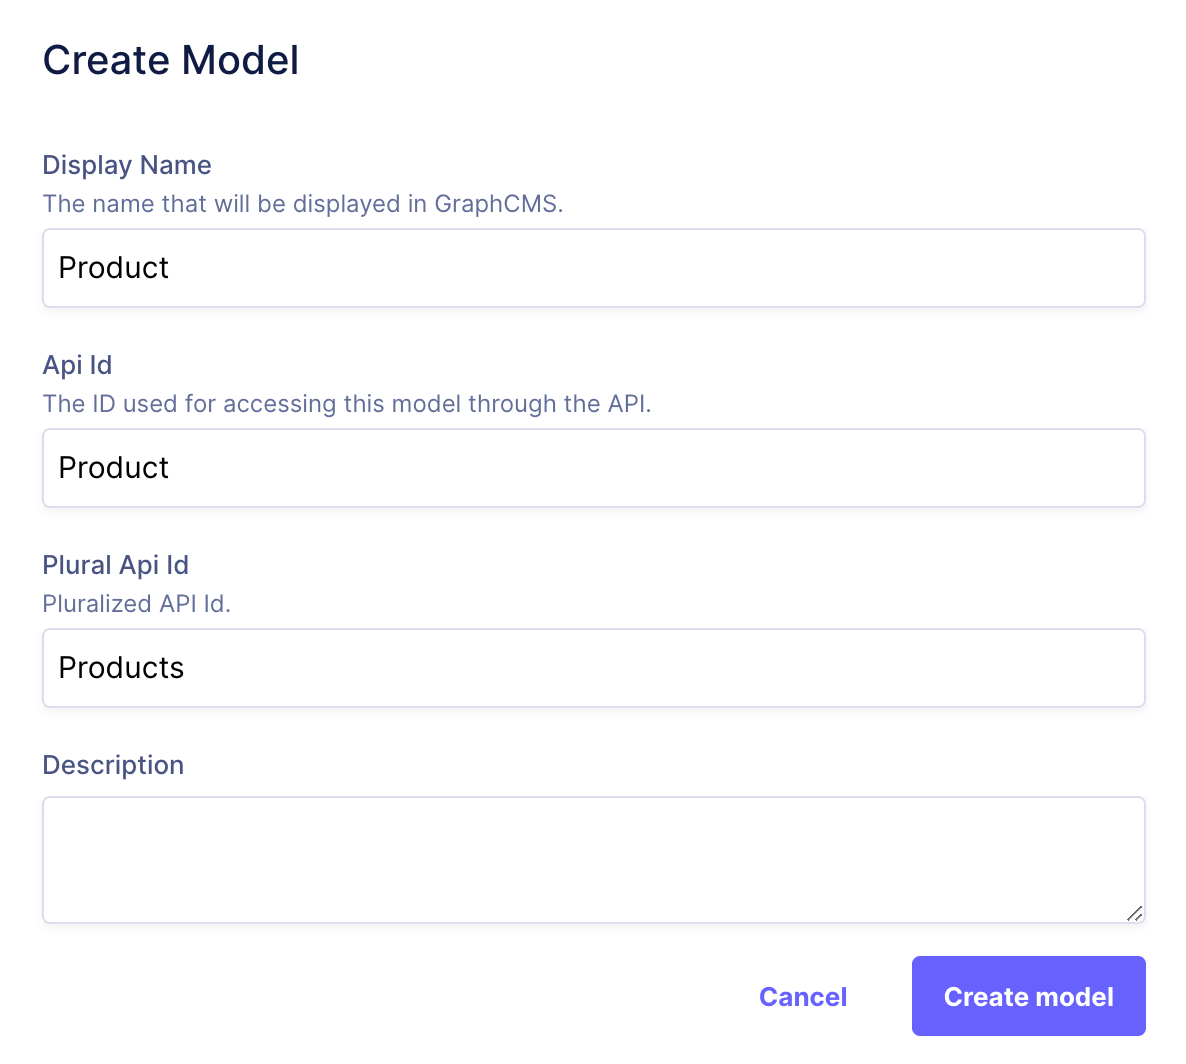
Now, Add a new Model called Product, keeping the default API ID and Plural API ID intact.
We now have a Product model within our GraphQL schema. This is often thought of as a database "table" or "collection" in NoSQL.
We will now add some fields to our Product model for a product name, price and image. To add a field, select one of the field types from the right side of the schema editor.
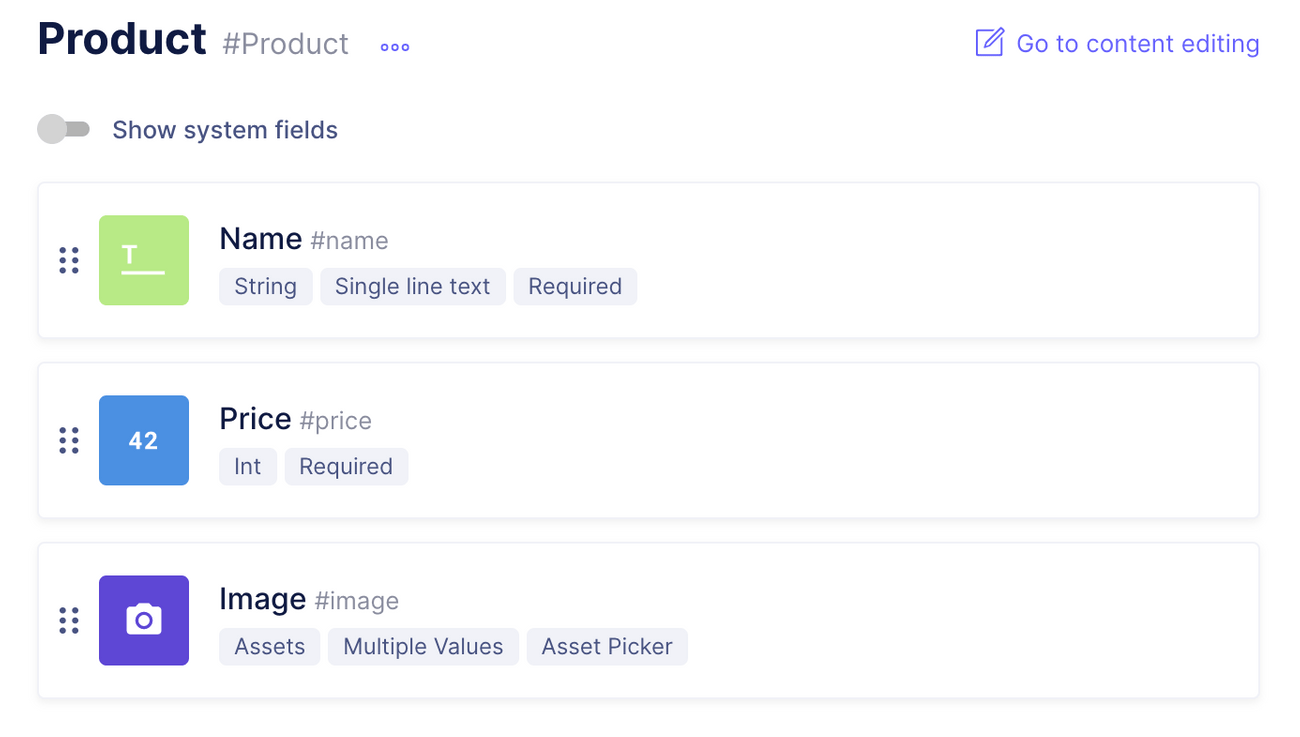
Select Single line text from the available types and set the Display Name to Name, and mark the field as required.
Next, select Integer from the available types and set the Display Name to Price, and mark the field as required.
For product images, we can take advantage of the Asset model. Creating an Image field using Asset will create a relation between the two models.
Assets are a core feature in GraphCMS and added to every new project by default.
Select Asset Picker from the available types and set the Display Name to Image, and allow multiple values.
Your Product model should now look a little something like the following.
We will now add some content to our Product model. To add a product, using the sidebar, navigate to the content editor.
Select Product from the list of models on the left.
Once content is added, entries will appear in the table view where you can filter, and paginate your content to find what you're looking for to edit.
Click Create New from top right to create your first content piece.
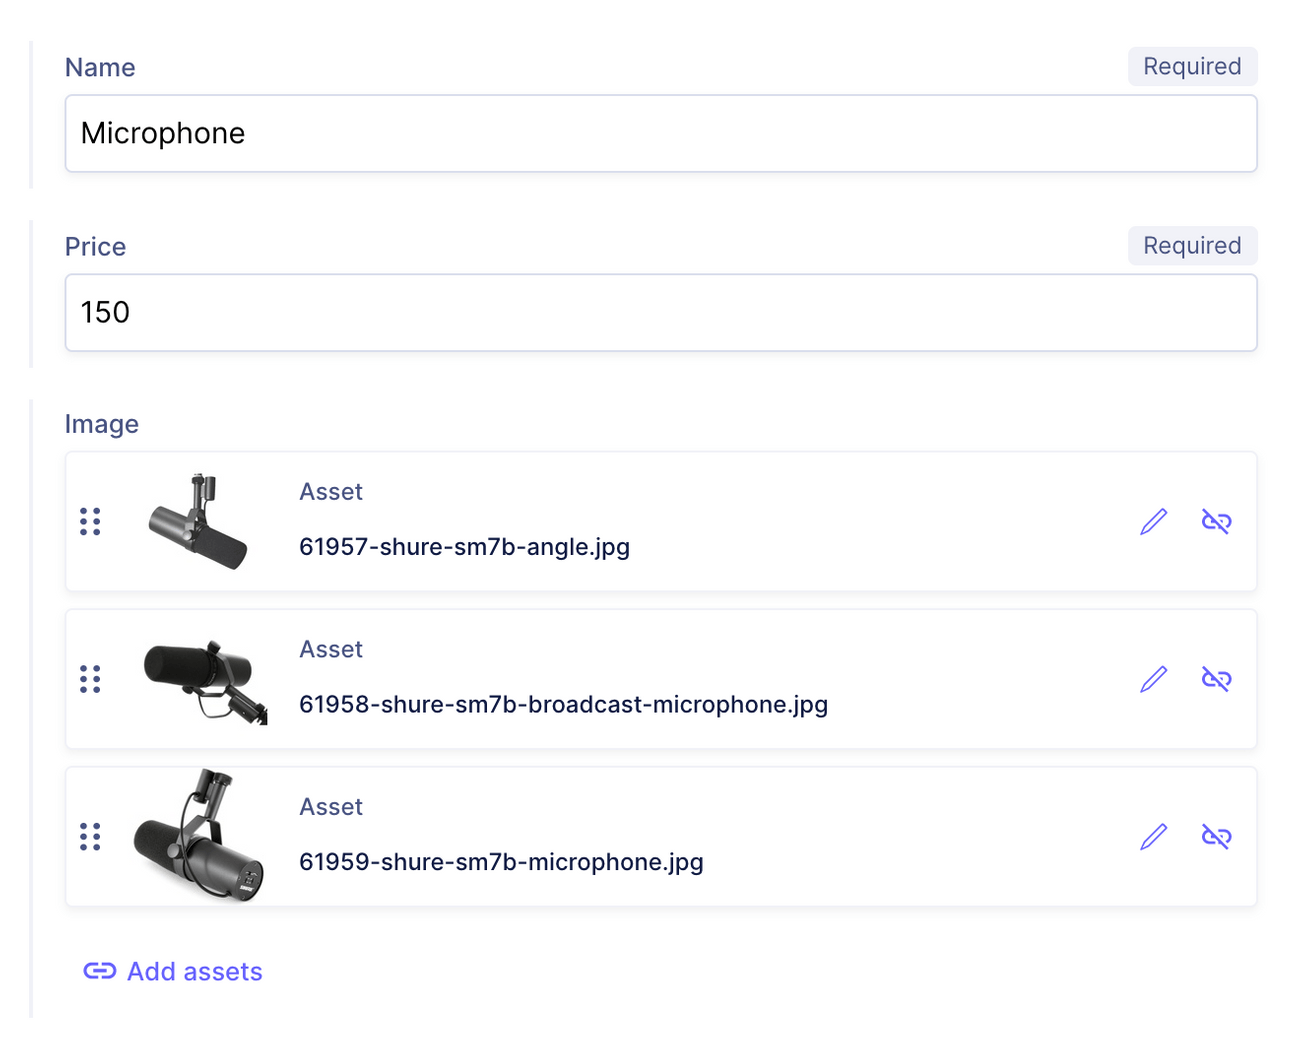
Give the Product a Name and Price.
Name and Price were to set to required in the schema, so the UI here reflects those constraints. Image allows multiple images to be uploaded since we allowed multiple values in the schema.
Next, upload one or more images by clicking Add assets and then Upload inside the modal.
Pick any image(s) from your computer, or social network account to upload.
Once uploaded, your content entry should look a little something like this.
Once content has been written, or updated, it's important to save or publish any changes.
By default, all content that you create will be have the a stage field, set to DRAFT.
Once you publish content, a copy is then made for the PUBLISHED stage. Drafts can be thought of as the master copy of content, where you can then push to the PUBLISHED stage.
Content can be queried using the stage which represents either DRAFT or PUBLISHED state.
GraphCMS provides a built-in API Playground to query and mutate content across your project.
From the sidebar, select API Playground. It's here where we will run the queries below.
Let's begin by querying for all products, regardless of their published state.
{products {stagenamepriceimage {urlfileName}}}
If you want to return DRAFT products only, then we can pass an argument to the products query.
{products(stage: DRAFT) {namepriceimage {urlfileName}}}
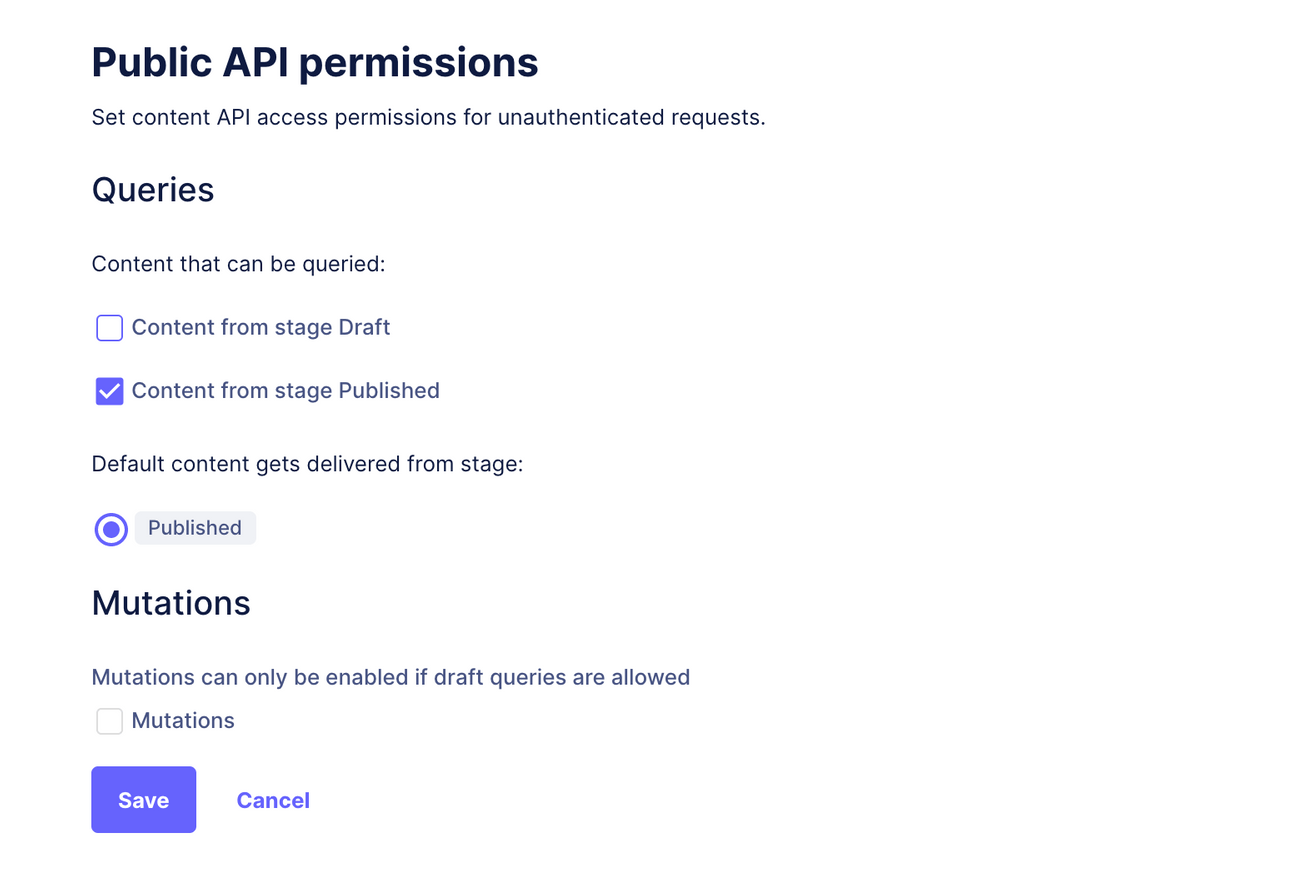
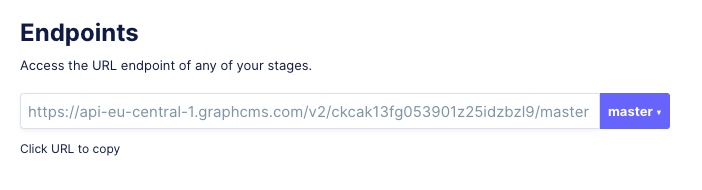
Navigate to your settings panel and enable access to your API. You can either enable full public access to your API or protect your API with permanent auth tokens.
Now that the API is public, let's test it. Copy your project's API endpoint and paste it in your URL bar for your browser.
In the GraphQL playground, run the queries above once more. These are now publicly accessible on the web!
This site uses cookies to provide you with a better user experience. For more information, refer to our Privacy Policy
